Une Bûche de Noël au Chocolat et Fruits Rouges(a photo of the finished cake will need to wait till tomorrow's post... but the process is well detailed below).
I have been making a variation on this Yule Log cake since I lived in Seattle. The last year I was there, and my last Christmas on the West Coast, I found in Gourmet Magazine -- either that fall (1995) or one of the prior years -- a recipe for a Bûche with chocolate ganâche, raspberry jam and raspberry eau de vie as made by the pâtissier of
La Maison de Chocolat in Paris.
Already at that time I was creative in my interpretation of the original recipe -- I didn't have any potato starch on hand (
féculant de pomme de terre - far easier to find in a French grocery store than in Seattle in 1995) and so replaced it with normal wheat flour. Nor did I have raspberry eau de vie -- which at the tender age of 27 I didn't even recognize as referring to alcohol, a lapse which has since been corrected. So, at the time, I simply soaked my raspberries in the simple syrup I prepared to drench the cake. Not that the lack was felt by the many who indulged in the cake as I drove from friend to friend sharing what had turned out to be quite a generous cake -- a little dark chocolate goes a long way.
In the years since I've taken further liberties with the original recipe, and along the way I lost the page I'd taken from the magazine, well smudged with chocolate.
My current version of the recipe is enhanced/affected/adapted to include the pastry lore I've soaked up during my visits both professional and friendlyl at my local pastry shop -- my pâtissier's basic recipe for
biscuit, the base of most of his cakes which he then elaborates with ganâche, fruit jellies, mousses, pralines and more. He uses only egg whites, almond meal and powdered sugar. Hmmmm, and advised me to bake it in a very hot oven for a very short time -- just seize the outside and leave the cake as flexible and soft as possible to allow for rolling/bending/ etc.,
And of course, my chocolatier shared with me his basic ganâche recipe. And I started making oodles of jams alongside Erick, adopting the technique of 2x fruit to 1x sugar and leaving the fruit to release its juices for at least a few hours before putting it over a flame.
It's come to the point where the original recipe is no longer necessary. I simply make my bûche. And, when I come across someone who is gluten intolerant, I've many a solution. However, in the spirit of the season, I kept careful track of my steps yesterday and today. And below are the precise measurements (where possible in both American volumes and metric, but without a scale at Ma's house...) that I used this time around... Enjoy!
Ingredients :
For the biscuit :
1/4 cup unsweetened cocoa powder
1/4 cup almond meal
1/4 cup powdered sugar
6 egg whites whipped stiff
4 egg yolks whipped till lemon yellow
scant 1/4 cup brown sugar
For the jam:
1 pound fresh or frozen raspberries or mixed berries
1/2 pound sugar
To drench: if you have it on hand:
1/2 cup of raspberry eau de vie
1 cup sugar
1 cup boiling water
Or, you can do as I did yesterday: remove a cup of the sugared berry juices from the jam pot, add a 1/2 cup of white rum.
For the ganâche filling :
For the Ganache:
300 grams (12 oz) superior quality dark chocolate (like Lindt 70%, Valrohna 64%)
225 grams (9 oz) tablespoons heavy cream
for the coating:
200 grams (8oz) superior quality dark chocolate (like Lindt 70%, Valrohna 64%)
150 grams (5 oz) tablespoons heavy cream
To make the biscuit : Preheat oven to 400F/200C
Sift your cocoa and lightly blend with the ground almonds and powdered sugar.

Whip the egg whites stiff.
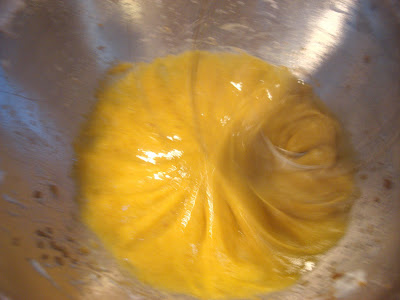

In a separate mixing bowl, whip till lemon yellow the egg yolks and brown sugar.

Sprinkle in some of the dry ingredients, then fold together with the egg whites and the rest of the dry ingredients.
Spread thinly on a lined (with parchment paper) or non-stick baking sheet, or on a silpat atop a cookie sheet.
It is important to
either bake the cake on a silpat and let cool, then remove onto parchment paper before drenching in syrup/alcohol,
or to bake it directly onto parchment paper, remove onto another sheet of parchment paper when cool, and drench. I once made the rather total error of leaving it on the silpat and drenching it with the syrup/eau de vie mixture. It then stuck terribly and made a total visual catastrophe of a dessert. Lessons must be learned, right?

Bake for 5 minutes – till the surface is lightly browned, but the center still soft.
Remove from the oven promptly. And let cool. Reverse onto a large sheet of parchment paper and put aside.
Mix together the eau de vie and the simple syrup (or do as I did yesterday) and brush evenly and generously with a pastry brush over the biscuit and let soak in.
For the jam:


Put your fruit and sugar into a bowl (this can be done the night before) with a 1/2 cup of water (if not the night before) and set it to simmer. Once it is nicely blended and bubbling, ladel your berries into a vegetable mill and grind away. The grinding will release the pectin present in the raspberry/blackberry seeds and help thicken your jam. Not feeling the need to truly remove all those seeds, (in a mixed berry jam) which is far more necessary if you're only using raspberries/blackberries, I put the solids back into my jam pot and continued simmering till the mixture thickened sufficiently -- when it cooled a thick skin formed on the surface.
For the Ganache:
Chop the chocolate into very small pieces. You can use a large knife, a meza luna rocking chopper, or a food processor. Put your chocolate into a large mixing bowl.
In a saucepan, heat the heavy cream till just the boiling point. Remove the cream from the heat and pour it slowly over the chocolate – you can pour it on the whisk to limit splatter. Stir gently till the chocolate melts into the cream.

Pour your chocolate over your biscuit, and gently spread it out in an even layer. Let cool and set, this will take at least 2 hours.
Finishing touches :
Once the chocolate is cooled and set (you may want to speed up the process by putting it in the fridge a bit), spread your jam (somewhat cooled too) over the ganâche and let set for a couple of hours.

Having your cake on the parchment paper gives you a tool for rolling the cake. You can roll it either the short direction -- for more rolls, or the long direction -- for more slices. I tend to do the latter.

Once your cake is rolled up, put in the fridge covered to set. It is best to leave it over night.
The next day, slice off the ends of your bûche on an angle and position them as branch stumps. Then melt more chocolate with a bit of heavy cream to extend it, drizzle over your bûche (being cold, it will quickly set the chocolate). Then pull a fork over it to design your bark.
When you are ready to serve: Sprinkle of powdered sugar on top.
A fun touch is meringue mushrooms... boughs of holly or branches of pine, or perhaps even some snow drifts of whipped cream (not unwelcome with such a rich cake).
Slice carefully, and enjoy!
 left-over jam never goes to waste.


